

Welcome! This post outlines the editing process for my Streetcar / Bridge shot.
As with many of my previous shots, these simple edits were done in Lightroom. If you have not had the chance to read my initial post on this shot, please do.
Let’s get to it!
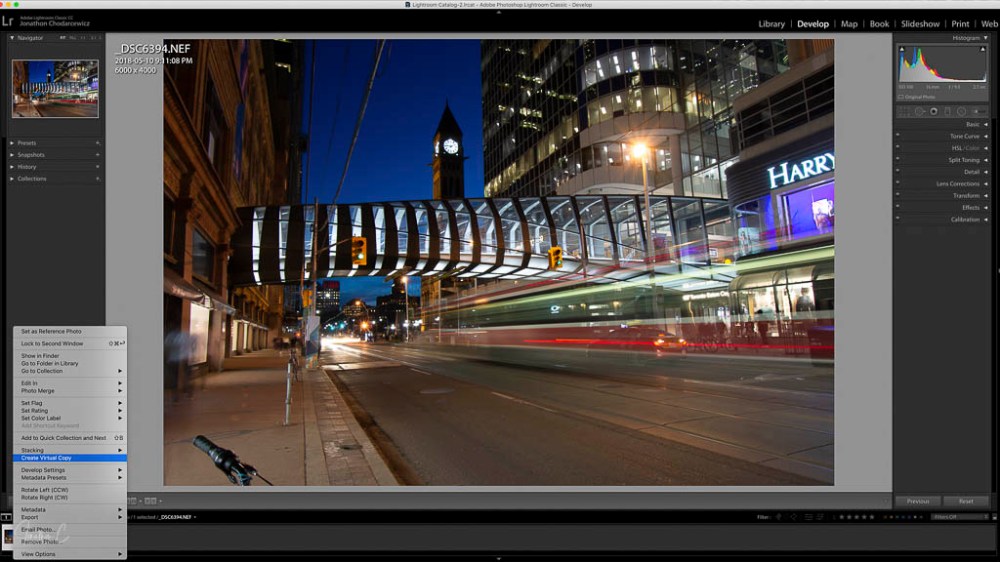
STEP 1: Before editing, I CREATE A VIRTUAL COPY:
- Right Click on the image
- Choose Create a Virtual Copy
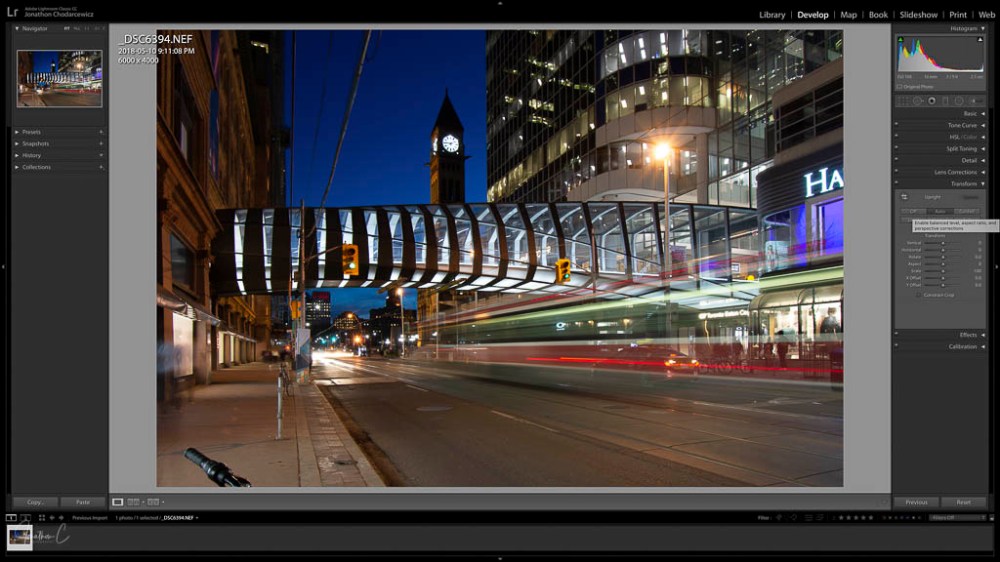
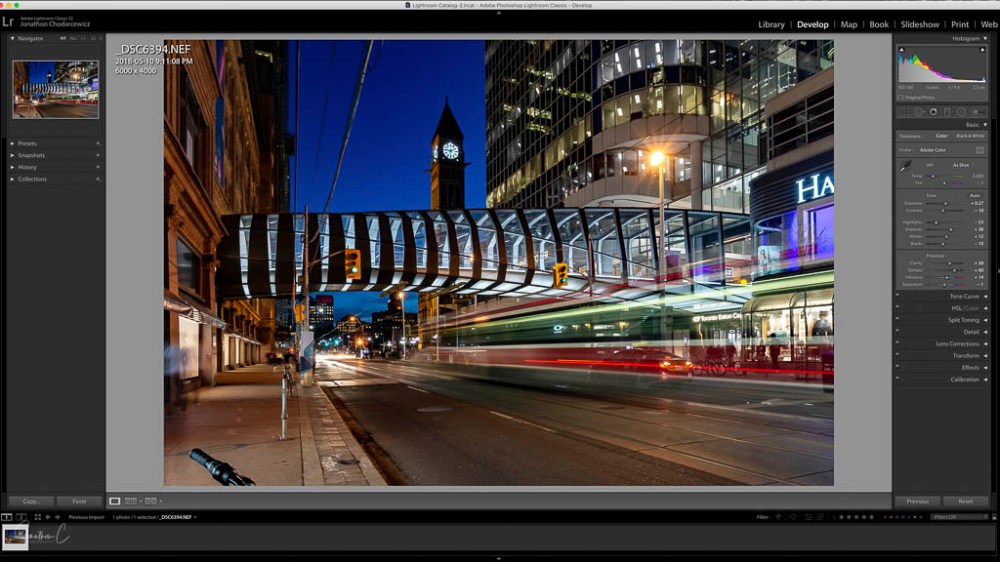
STEP 2: TRANSFORM
- Click AUTO
This aligns things well. Although undesirable elements remain in the shot, I ignore them because I will crop them out later.
STEP 3: LENS CORRECTION – in Profile Mode:
- Enable LENS CORRECTION
- Enable REMOVE CHROMATIC ABERRATION
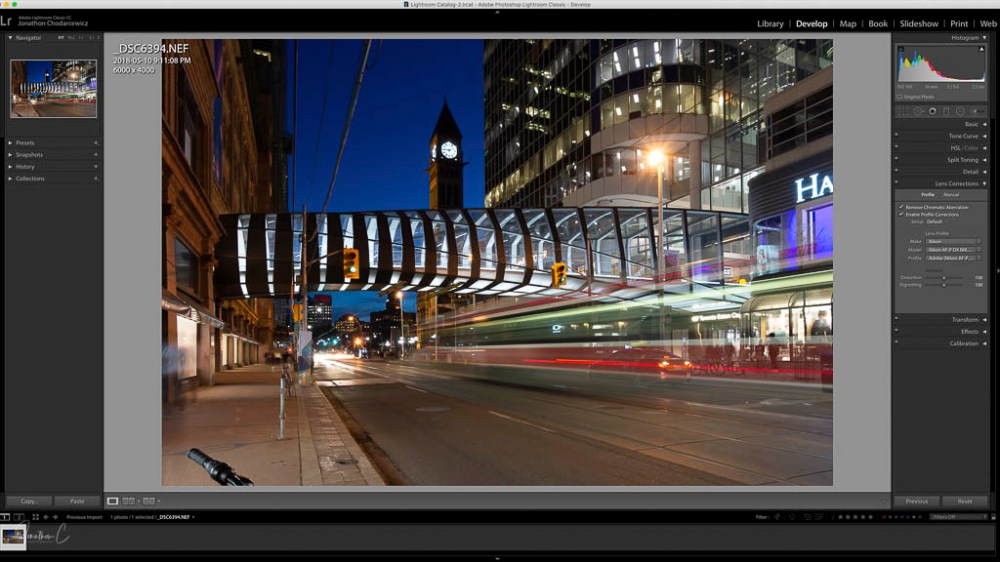
The changes are subtle, but some lens distortion is corrected at this stage.
STEP 4: DETAIL panel:
- NOISE REDUCTION: I adjust sliders to the low 80s.
- SHARPENING: I adjust sliders to preference.
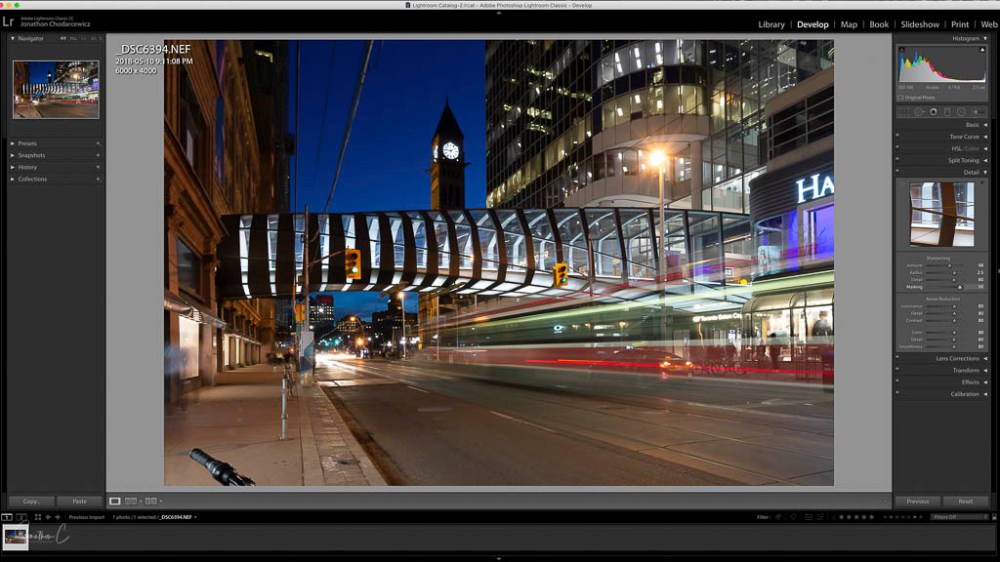
These adjustments are essential for night shots as they eliminate noise.
STEP 5: BASIC panel.
In the PRESENCE section, I:
- set DEHAZE between 60-65 (personal preference)
- set CLARITY between 30-35 (personal preference)
- set VIBRANCE and SATURATION to preference
In the TONE section, I:
- Click AUTO
- Adjust sliders to preference – I only change contrast now because I will adjust the others after converting the image to a colour splash.
STEP 6: CROP
- Click on CROP TOOL located under the histogram
- Adjust CROP Overlay
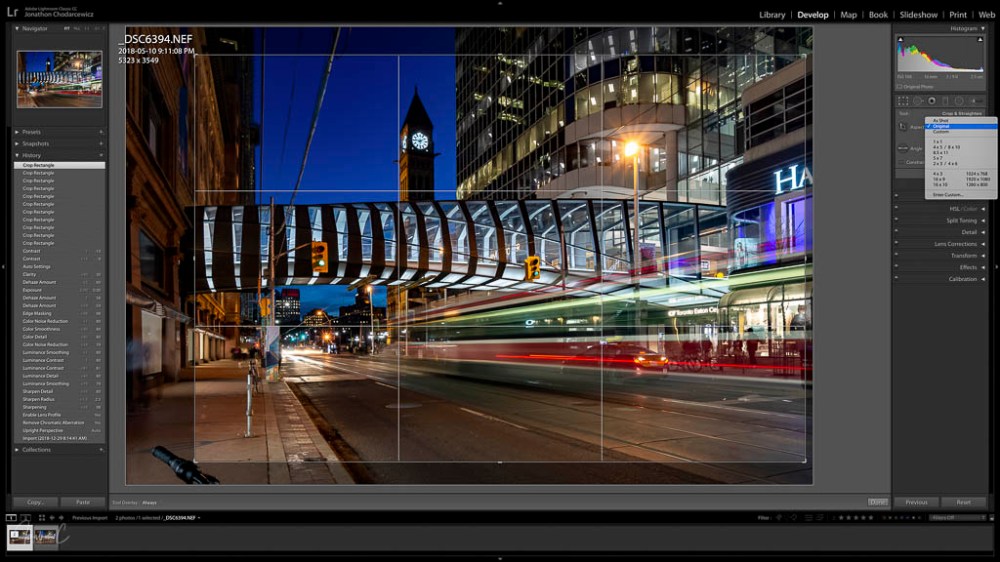
There are 2 elements I want to eliminate from this shot – the bicycle handles and people in motion on the left edge. When cropping, I keep the bridge in the middle 3rd for emphasis, and the street car in the right 2/3 to show motion and direction.
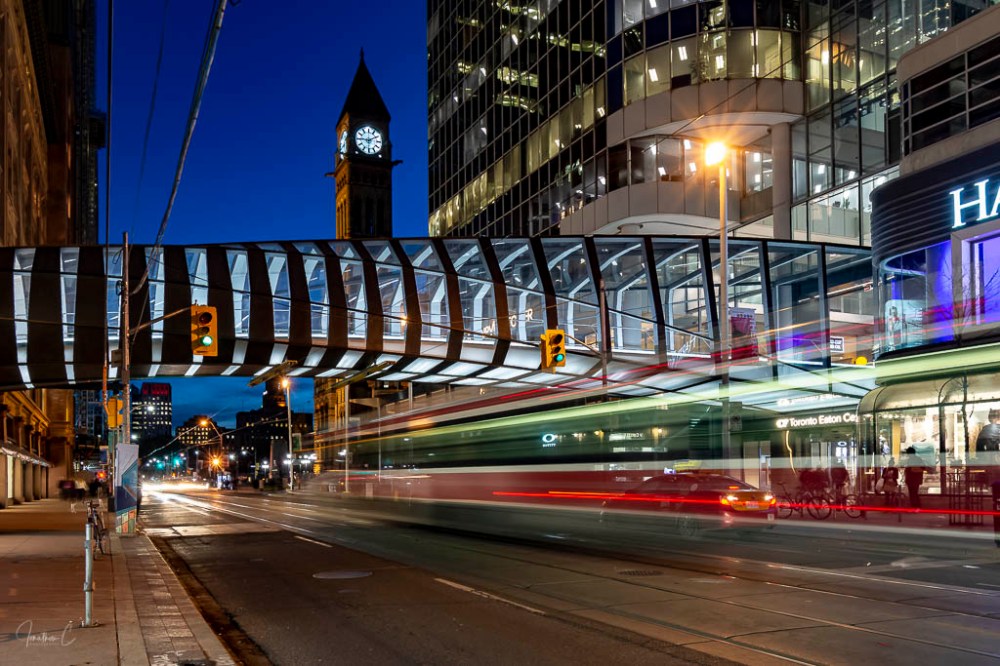
There you have it – a simple process resulting in this shot.
I will outline my colour splash conversion process in my next blog. Until then, I’d love to hear from you! Did you find this interesting? Useful? Please share your thoughts and what you liked about it!
COMING SOON: The second instalment in my “Where To” series about the area around the CF Eaton Centre pedestrian bridge! If you haven’t read my post on the bridge itself, please do – I’d love to know your thoughts.
Don’t forget to click like and recommend Jonathon C Photography to your friends or anyone you know who may find it interesting.
Finally, please follow jonathoncphotography.com so you can always be first to hear about all the new content that I post!

[…] to my long exposure / streetcar shot. If you haven’t had the chance to look at my initial pieces on it, please […]
LikeLike
[…] my Streetcar Edit post, I detailed my global edit process for my long exposure streetcar shot. In this final post on […]
LikeLike