

In my Streetcar Edit post, I detailed my global edit process for my long exposure streetcar shot. In this final post on this image, I will outline my individual edits to create the colour splash effect.
Let’s get to it!
The tools I used for this are Radial Filter and Brush tool. They can be found right below the histogram in the Lightroom workflow.
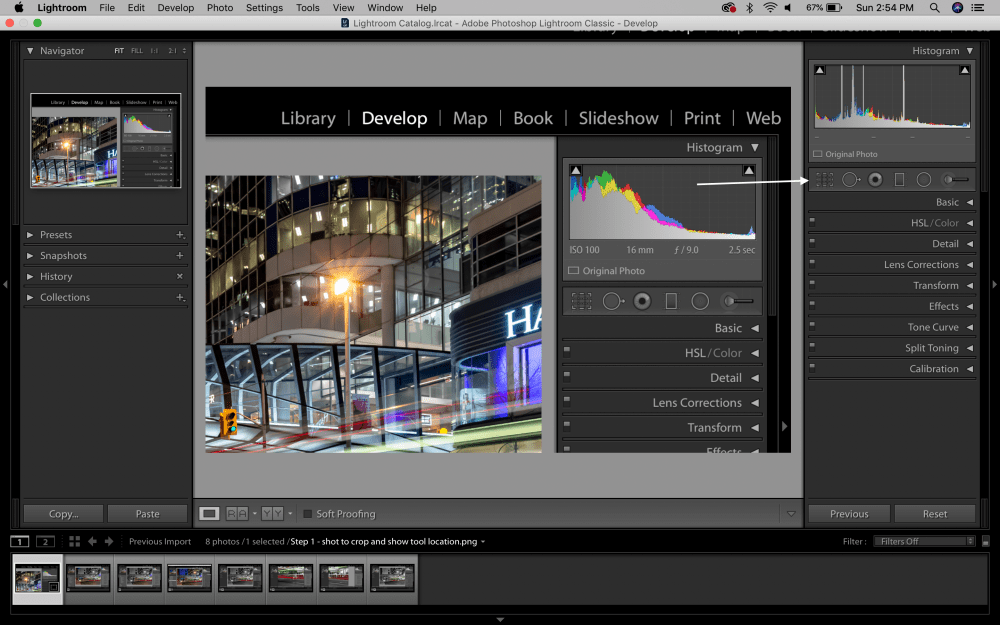
STEP 1: Apply RADIAL FILTER
Click on the icon and open panel to reveal available adjustments. I used:
- Effect – expand the panel to reveal adjustments
- To eliminate colour, adjust SATURATION to -100 and apply filter to specific areas of the image

I added multiple filters eliminating most colour from the image.


STEP 2: ADJUST SATURATION
I only want to keep red and green in the image, so to easily remove the remaining colours, I:
- Click and expand the HSL / Colour Tab
- Select SATURATION
- Adjust Sliders to 0 for all colours (other than red or green)
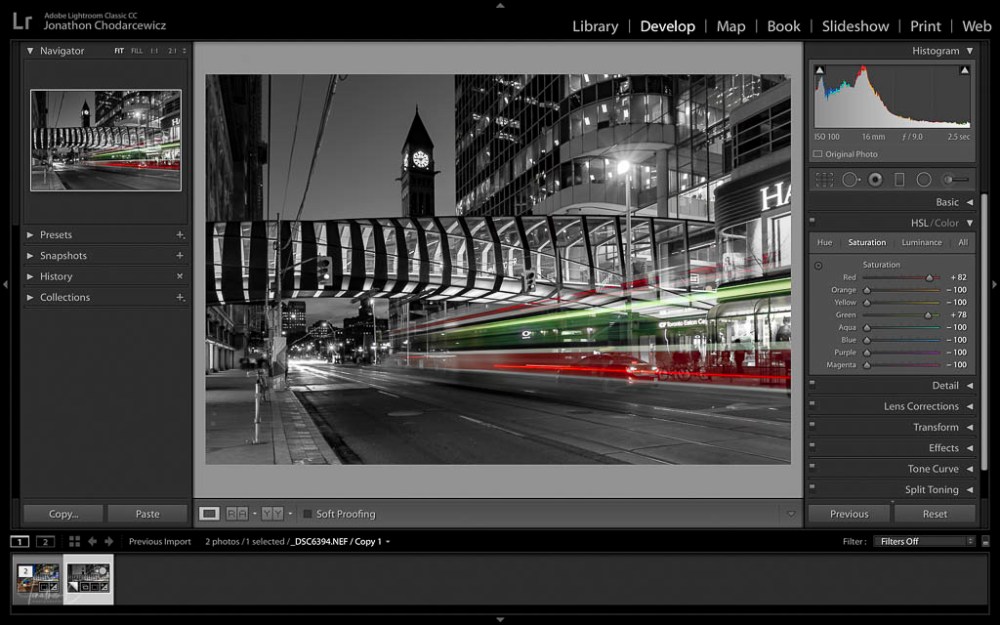
NOTE: for increased emphasis, I increased the saturation levels of red and green for this image.
STEP 3: BRUSH TOOL
Click on the icon and open the panel to reveal 3 bushes. For a more detailed explanation of BRUSH SETTINGS, click here.
After customizing desired settings, open the panel to reveal available adjustments. I used:
- Effect: set SATURATION to -100 and brush sections of image containing colour that needs to be removed
- Zoom in for smaller areas and adjust size of brush to reach smaller areas
TIP: when zoomed in and using the brush tool, press and hold the space bar and use the mouse to pan around the image.


When painting away colour, I decide to desaturate the red in the taxi and all areas behind it other than the streak of light created by the streetcar. In my opinion, it creates a better effect.
STEP 4: APPLY FINAL GLOBAL ADJUSTMENTS (if necessary)
- Open BASIC Panel
- Adjust sliders to preference
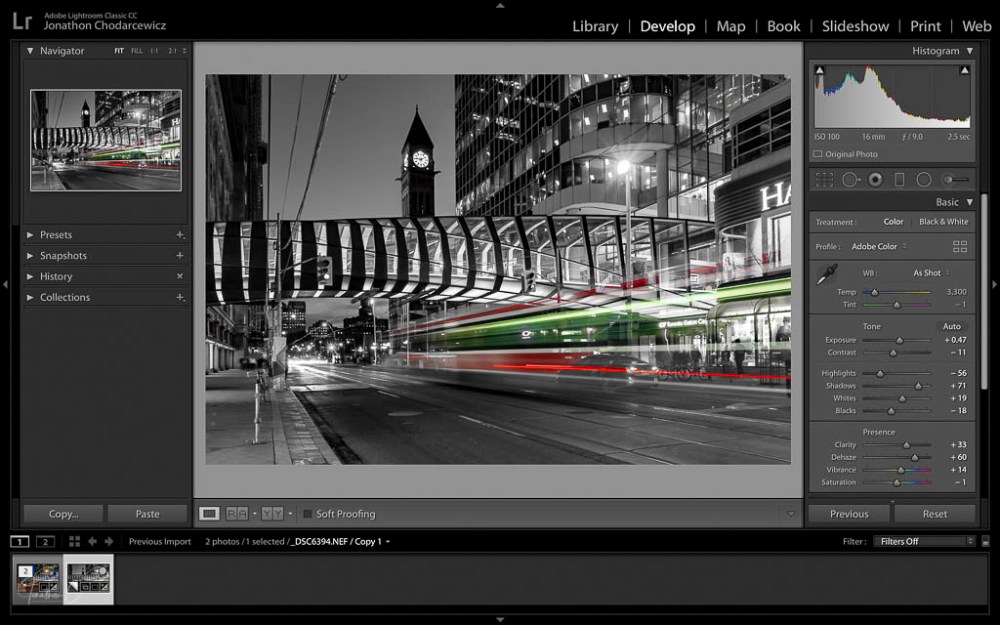
For this image, I made a few adjustments to the contrast, shadow, highlight, white and black levels to achieve my final product:
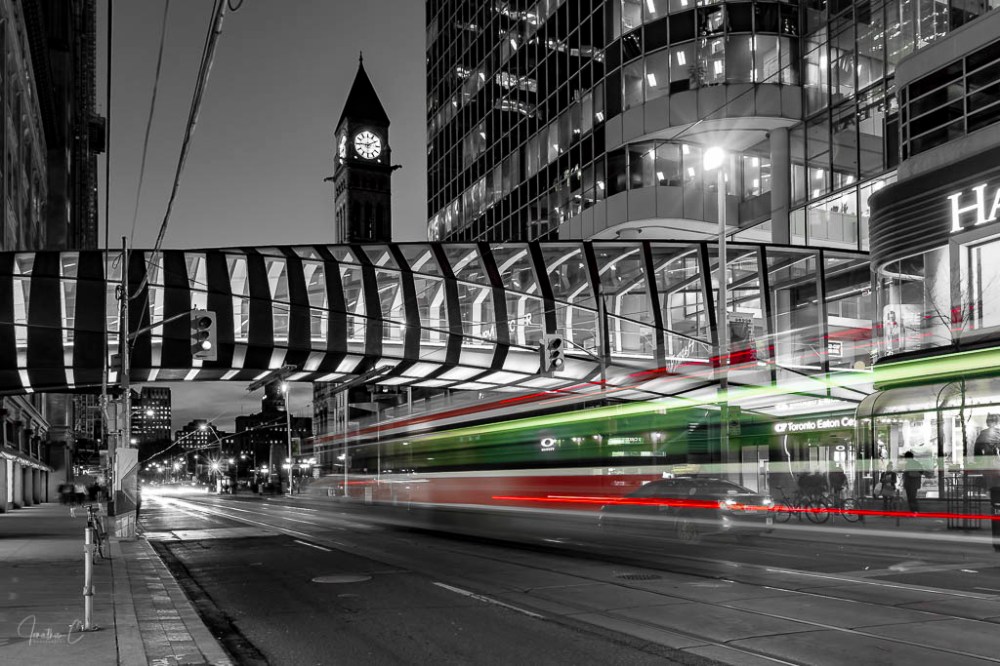
There we have it – and easy editing process which produced a great final image! I’d love to hear from you! Did you find this interesting? Useful? Please share your thoughts and what you liked about it!
COMING SOON: The final instalment in my “Where To” series about the neighbourhood around the pedestrian bridge. If you have not read my first 2 posts on different locations in the area, please do.
Don’t forget to click like and recommend Jonathon C Photography to your friends or anyone you know who may find it interesting.
Finally, please follow jonathoncphotography.com so you can always be first to hear about all the new content that I post!

[…] Welcome to my next “How To” series in which I demonstrate how to create an image when lacking proper equipment to capture an entire scene with one shot. As with previous posts my hope is to inspire and create discussion. […]
LikeLike