

Welcome! This post outlines the editing process of my Financial District Perspective shot.
The edits for this shot are somewhat basic as the shot was fairly good out of camera, so this process will be easy to follow. If you have not had the chance to read my initial post on this shot, please do so here.
Let’s get to it!
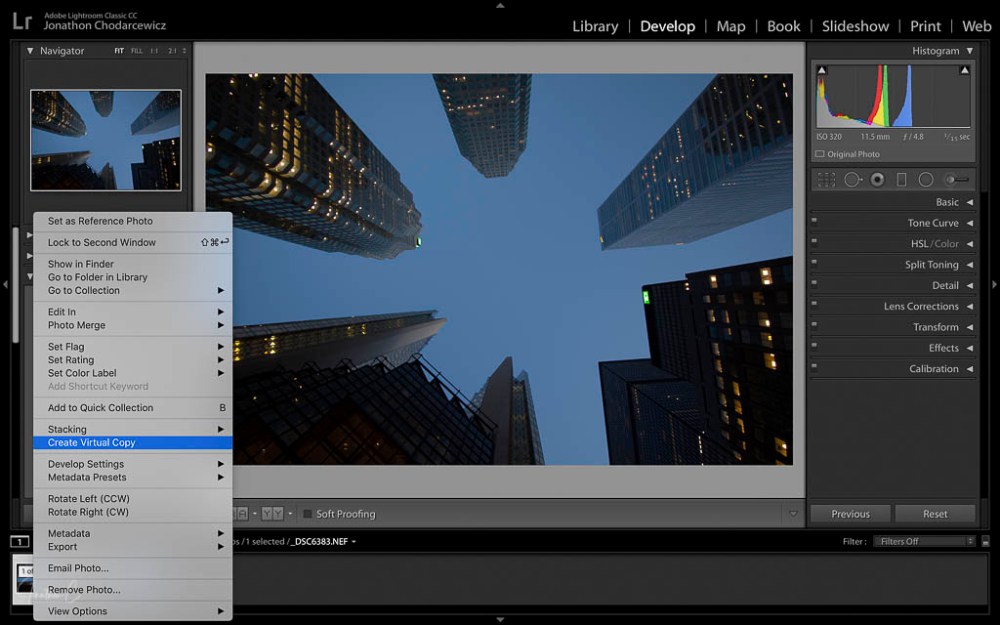
STEP 1: Before making any edits, I CREATE A VIRTUAL COPY:
- Right Click on the image
- Choose Create a Virtual Copy
STEP 2: LENS CORRECTION – in Profile Mode:
- Enable LENS CORRECTION
- Enable REMOVE CHROMATIC ABERRATION
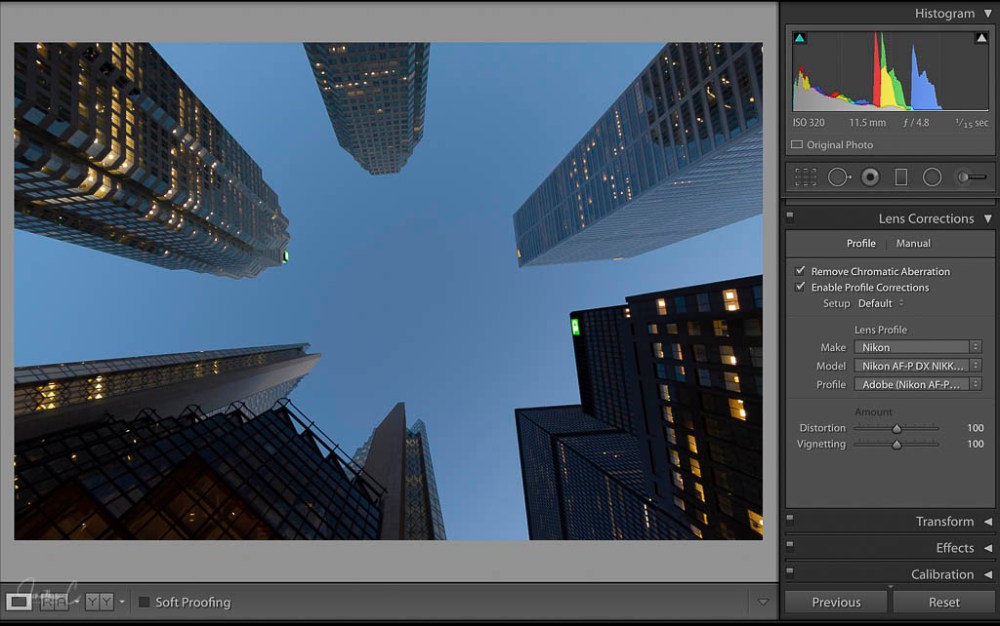
Note: Normally, I would use the transform panel as my second step, but because I like the composition of the shot out of the camera, I choose to skip it.
STEP 3: DETAIL panel:
- NOISE REDUCTION: I adjust all these sliders to the low 80 range.
- SHARPENING: I adjust the sliders to personal preferences for the shot

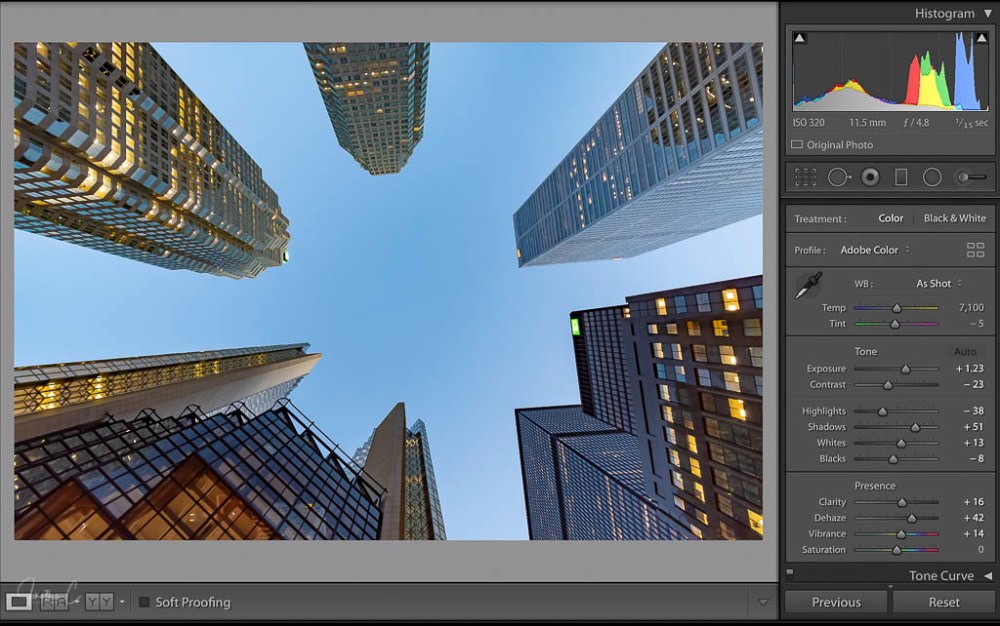
STEP 4: BASIC panel.
In the PRESENCE section, I:
- set DEHAZE between 40 – 45
- set CLARITY between 15 – 20
- set VIBRANCE and SATURATION to preference
In the TONE section, I:
- click AUTO
- adjust specific sliders to my personal liking – normally, I adjust quite a few, but for this shot, I didn’t adjust a single one
STEP 5: Profile (inside the BASIC panel):
- Click on Adobe Colour (beside PROFILE)
- Scroll down and choose BROWSE

- Scroll down and sample different BW profiles (I know I want to convert to BW)

- Choose best profile (according to personal preference)
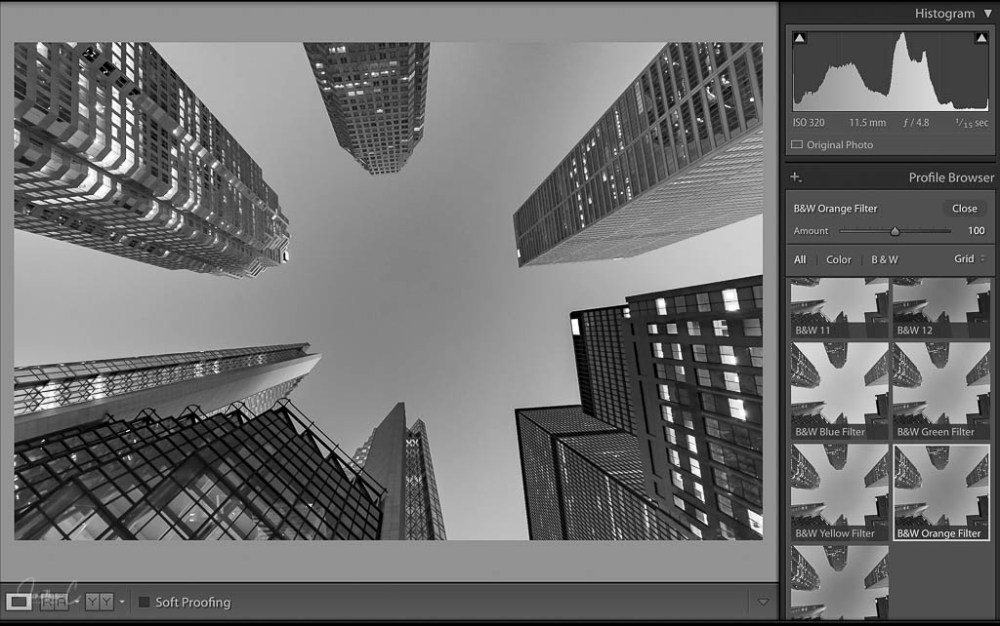
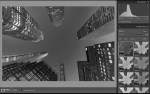
STEP 6: B & W panel:
- Adjust Black & White sliders to preference

And there you have it – a simple process which results in the final product:

I’d love to hear from you! Did you find this post interesting? Useful? Please share your thoughts and what you liked about it!
COMING SOON: The second instalment in my “Where To” series about public art installations in the Financial District! If you haven’t read my first post, please do – I’d really like to know what you think.
Don’t forget to click like and recommend Jonathon C Photography to your friends or anyone you know who may find it interesting.
Finally, please follow jonathoncphotography.com so you can always be first to hear about all the new content that I post!

[…] edits for this shot are similar to edits I have outlined previously, so this process will be easy to follow. If you have not had the chance to read my initial post […]
LikeLike