

In My 5-Step Global Lightroom Edit, I detailed how I edit an entire image. In this final post of my subway image “How To” series, I will outline how to make edits to individual parts of an image.
The 6 tools used to apply specific adjustments are located in the adjustment panel below the histogram. They are:
 Crop Overlay
Spot Removal
Red Eye Correction
Graduated Filter
Radial Filter
Brush
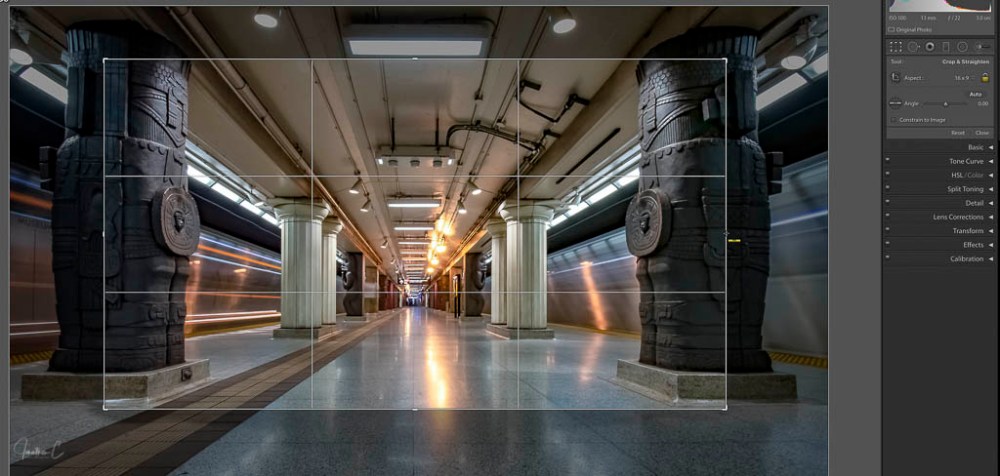
STEP 1: CROP OVERLAY
Open panel to reveal available adjustments. I used:
- Aspect gives you a variety of dimensions. I wanted a wide image so I chose 16X9
- Lock – I didn’t open the lock so I could keep the desired dimensions during the crop


- Adjust to get the desired crop
STEP 2: RADIAL FILTER
Click on the icon and open panel to reveal available adjustments. I used:
- Effect – expand the panel to reveal adjustments
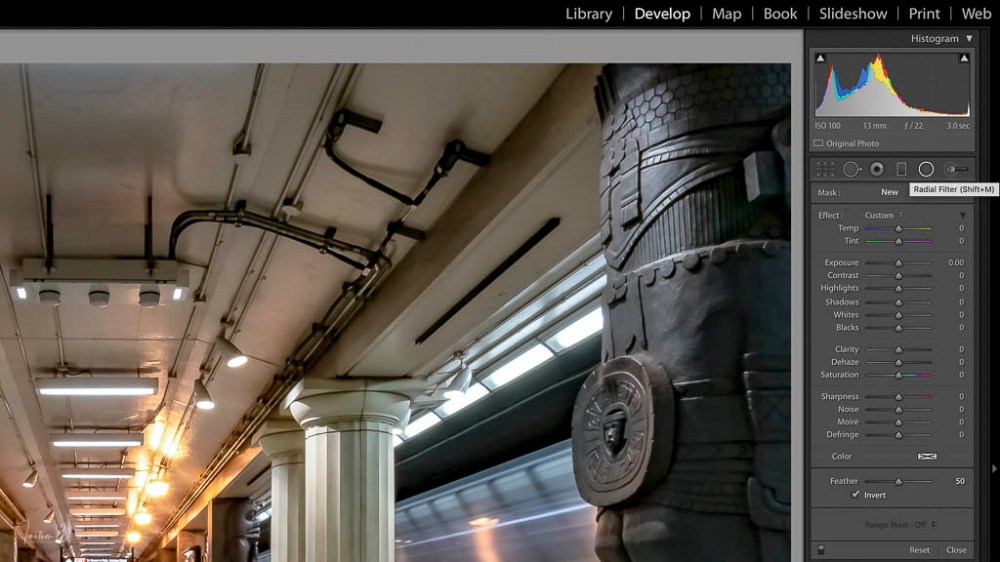
- To eliminate colour, adjust SATURATION to -100 and apply filter to specific areas of the image


This step removes colour from most of the image.
STEP 3: BRUSH TOOL
Click on the icon and open the panel to reveal 3 bushes (A, B and ERASE). A & B can be individually customized and saved. ERASE removes the effects that have been applied.
There are 4 customizable settings for the brushes:
- Size: adjust by scrolling on mouse or using [ ] keys
- Feather: how much feathering is around the outside of the brush
- Flow: how much effect is applied for every stroke. If you set flow to 50%, it takes 2 strokes to get to 100% effect
- Density: the opacity for the effect – if set to 50%, that is the maximum opacity that will be applied
After customizing desired settings, open the panel to reveal available adjustments. I used:
- Effect: set SATURATION to -100 and brush sections of image containing colour that needs to be removed
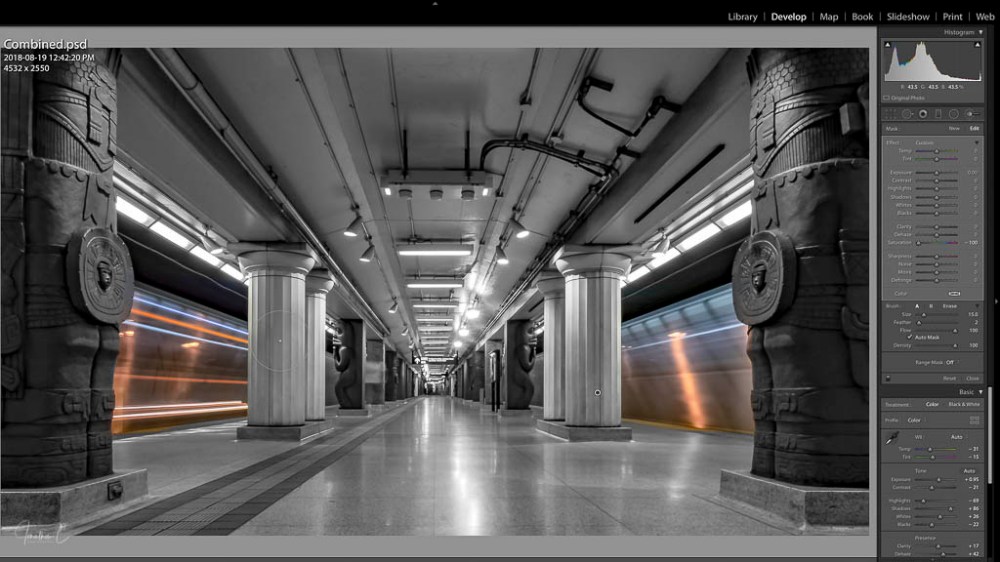
- Zoom in for smaller areas and adjust size of brush to reach smaller areas


TIP: when zoomed in and using the brush tool, press and hold the space bar and use the mouse to pan around the image.
- Apply any other necessary adjustments (for this image, I used the brush to lighten shadows and exposure on the columns)

STEP 4: APPLY FINAL GLOBAL ADJUSTMENTS (if necessary)
For this image, I adjusted saturation and hue of the remaining colours…

…until I produced the final product:
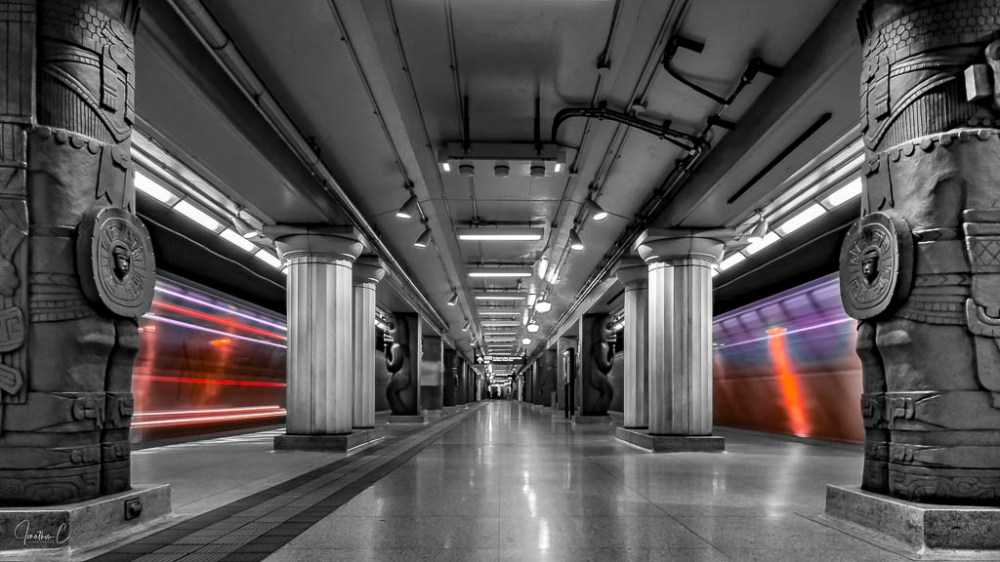
There we have it – the blended, colour splash subway image! Thanks to everyone who has gone through this series of blogs with me! I hope the journey has been helpful!
Next week, I will start a new “How To” series on the creation of a unique image showcasing another amazing location in Toronto!
Until then, I’d love to hear from you! Did you find this interesting? Useful? Please share your thoughts and what you liked about it!
COMING SOON: The final instalment in my “Where To” series about The Royal Ontario Museum! If you haven’t read the first 3 instalments, please take a look!
Don’t forget to click like and recommend Jonathon C Photography to your friends or anyone you know who may find it interesting.
Finally, please follow jonathoncphotography.com so you can always be first to hear about all the new content that I post!

[…] Click on the icon and open the panel to reveal 3 bushes. For a more detailed explanation of BRUSH SETTINGS, click here. […]
LikeLike