

In 8 Steps to the Perfect Blend, I outlined how I blend shots in Photoshop. In this post, I will show my Lightroom editing process for that blended image.
Editing is a subjective art, and when you look at my Instagram feed, my particular style is immediately obvious. I have an order in which I edit, but the specific adjustments vary from shot to shot. Here, I will only refer to adjustments I made for my Museum Station shot.
Let’s get to it!
In Lightroom, the adjustment panels are located on the right side of the workflow. They are:

Basic
Tone Curve
HSL / Color
Split Toning
Detail
Lens Correction
Transform
Effects
Calibration
The highlighted adjustments are what were used in this edit.


STEP 1: Before making any edits, I CREATE A VIRTUAL COPY. To do this:
- Right Click on the image
- Choose Create a Virtual Copy
OR go to MENU and
- Click on Photo
- Choose Create a Virtual Copy.
The copy appears beside the original in the filmstrip.

To begin applying adjustments, I always start at the bottom of the adjustment panel and move up.
STEP 2: TRANSFORM panel. (Note: to expand or close any of the panels, just click on the arrow to the right of the panel name)
I click AUTO, and usually find the result satisfactory to work with. If not, I use the adjustment sliders until I achieve the desired result. I rarely enable constrain crop because I manually crop later.
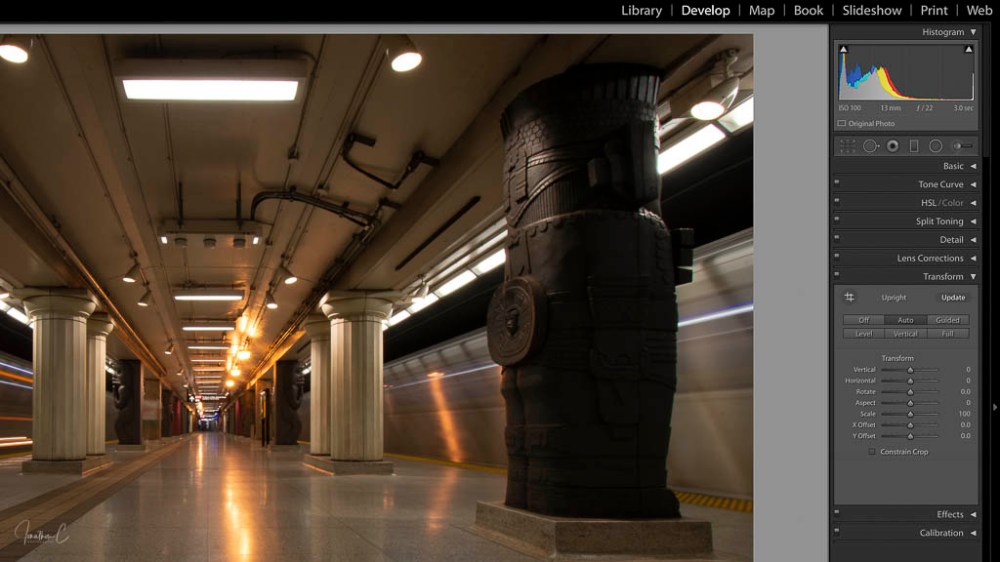
NOTE: For this shot, I was already happy with the perspective because of my original set up. Clicking AUTO didn’t change much, so I moved on without using the sliders.
STEP 3: LENS CORRECTION. (This panel allows Lightroom to correct any lens distortion or vignetting)
In PROFILE MODE, I:
- Enable LENS CORRECTION
- Enable REMOVE CHROMATIC ABERRATION
Lightroom automatically reads the lens I used for this shot, and fixes any issues.
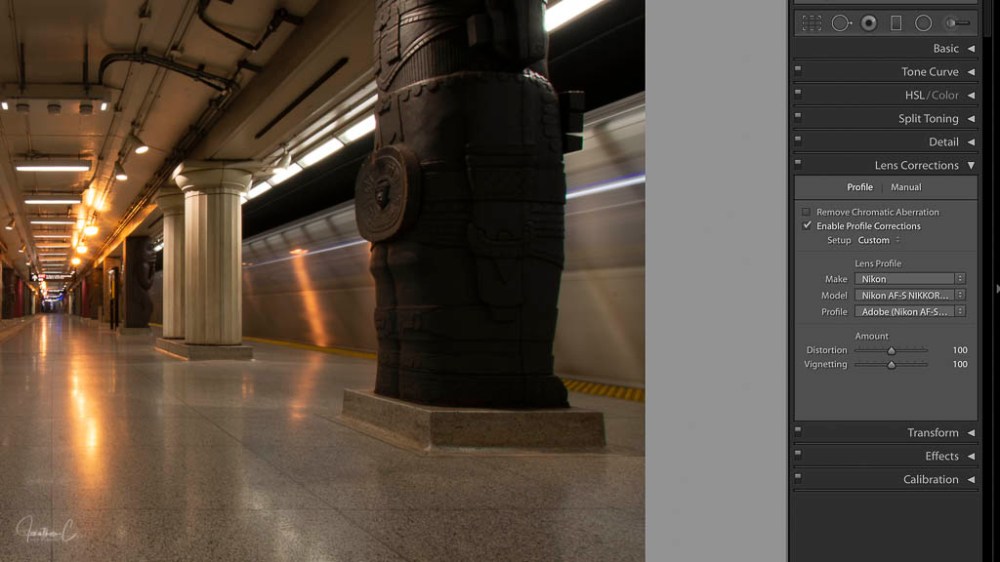
I only use the sliders in MANUAL mode to reduce further chromatic aberration. This shot doesn’t have any noticeable, so it was not necessary.
NOTE: Chromatic Aberration is the green or purple glow around the edges of something in your image.
STEP 4: DETAIL panel. This panel is divided into 2 sections.
- NOISE REDUCTION. I don’t like noise / grain, so I adjust all these sliders to the mid 70 low 80 range.
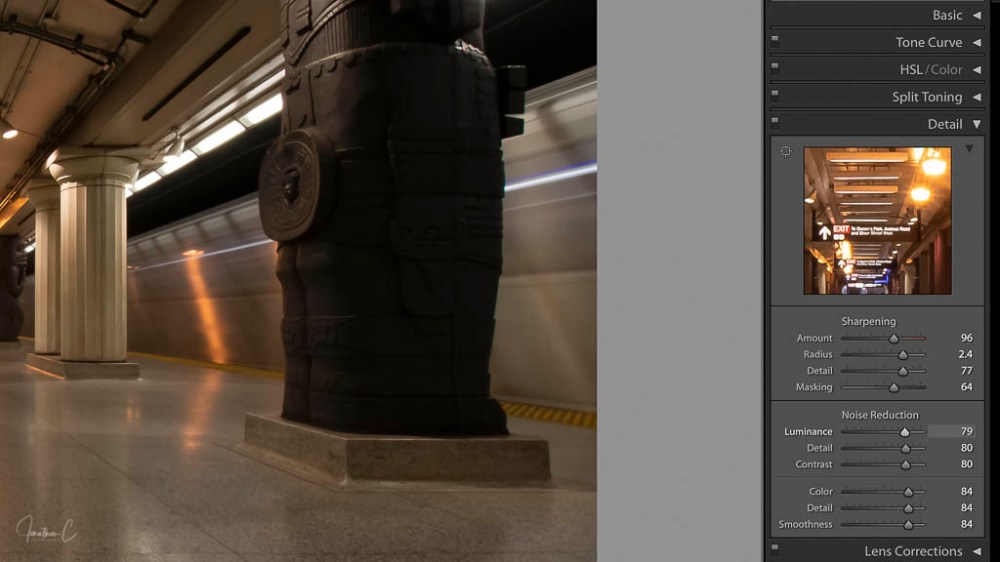
- SHARPENING. My go to sliders are Amount and Masking. Amount sharpens everything in the image (which would be overkill), so I use it in conjunction with Masking, which determines which parts of the shot will be sharpened. I always adjust until sharpening is applied to outlines of prominent items.
TIP: When using the MASKING slider, hold down the “option” or “alt” key to help you see how much of your image will be sharpened.
STEP 5: BASIC panel.
In the PRESENCE section, I:
- set DEHAZE between 30-40
- set CLARITY between 15-20
In the TONE section, I:
- click AUTO
- adjust specific sliders to my personal liking. For this shot, I adjusted the shadows and the blacks.
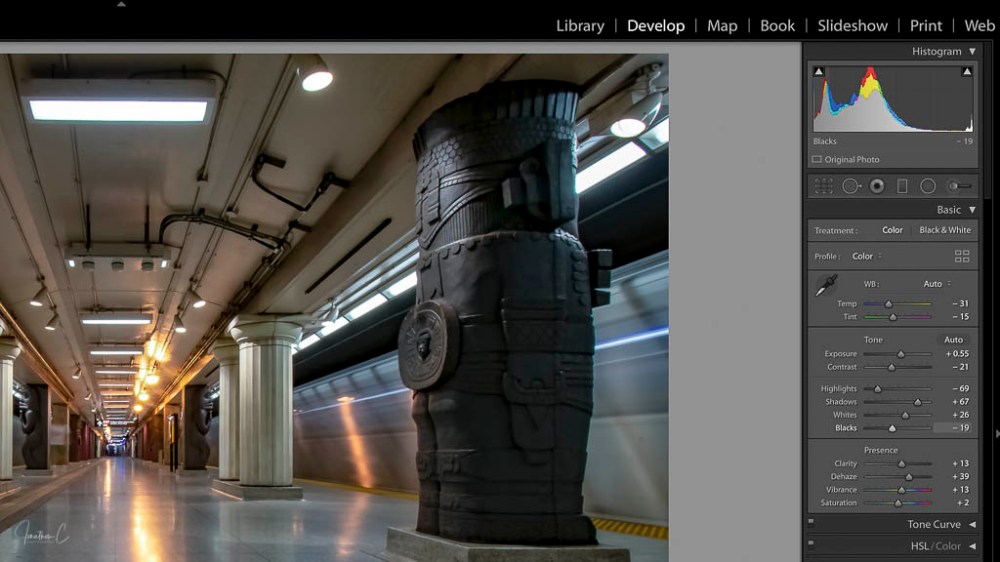
In the WHITE BALANCE section, I:
- click AUTO from the drop down menu (I usually like the result when applying this to indoor shots)
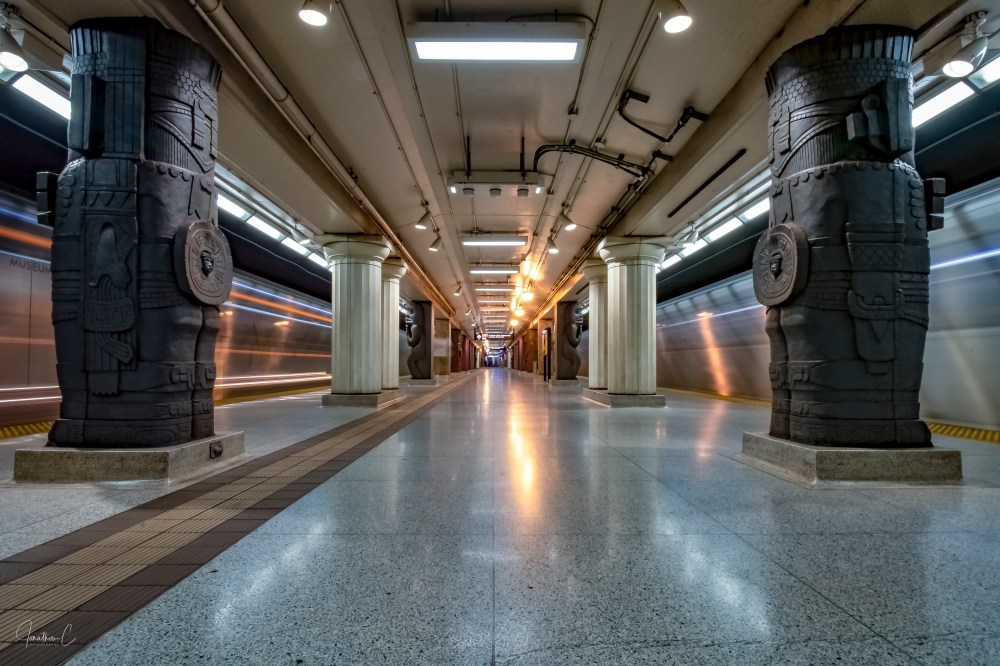
After completing this 5-step process, I now have this image.
So far, all of the edits have been global adjustments. Next week, my final post on this image will delve into adjustments on specific sections of the image and the tools I use to achieve them.
Until then, I’d love to hear from you! Did you find this interesting? Useful? Please share your thoughts and what you liked about it!
COMING SOON: The third instalment in my “Where To” series about The Royal Ontario Museum! If you haven’t read the first or second posts, please do – I’d really like to know what you think.
Don’t forget to click like and recommend Jonathon C Photography to your friends or anyone you know who may find it interesting.
Finally, please follow jonathoncphotography.com so you can always be first to hear about all the new content that I post!

[…] focusing on applying individual adjustments. If you haven’t read the first second or third posts, please take a […]
LikeLike
[…] My 5-Step Global Lightroom Edit, I detailed how I edit an entire image. In this final post of my subway image “How To” […]
LikeLike
[…] a previous blog, I outlined the order in which I edit. My process here is almost identical for the global edits, so I will briefly […]
LikeLike
[…] my Streetcar Edit post, I detailed my global edit process for my long exposure streetcar shot. In this final post on this […]
LikeLike