

Welcome to my next “How To” series of blogs. In the previous series, I shared aspects of my creative process as well as a few of my editing techniques. This series explores how I capture and edit an intriguing image using an artistic lens tool. As always, my hope is to inspire and create discussion and I look forward to hearing about your approach using different photography tools.
Let’s get started!
THE FINAL PRODUCT
This is the shot I wanted. How did I achieve it?

FROM CONCEPT to LOCATION
For this project, I wanted to produce an artistic image of an oft-photographed, recognizable Toronto landmark.
To make my shot unique, I envision a symmetrical shot, utilizing both colour and B&W all within a lens ball.
To accomplish my goal, I choose The Flatiron Mural by Canadian artist Derek Michael Besant. The mural is located on the back wall of the Gooderham Building in the St. Lawrence Market District of Toronto.


EQUIPMENT, SET UP & COMPOSITION
For this shoot, I need my camera, 35mm prime lens, tripod and lens ball.
I chose to shoot early on a Saturday morning to minimize pedestrian traffic in the park. I know I want the mural to be the central focus, but while searching for the right place to set up, the pattern of the walkway intrigues me. I decide to incorporate it into the shot and position my tripod and lens ball accordingly.


When using a lens ball, camera positioning is essential. A slight change in distance, angle or level produces a myriad of results – with differences ranging from too much sky or ground, to distortion of the focal point, or losing too much of the shape of the ball.


While all of the above images are workable, I decide to use this:
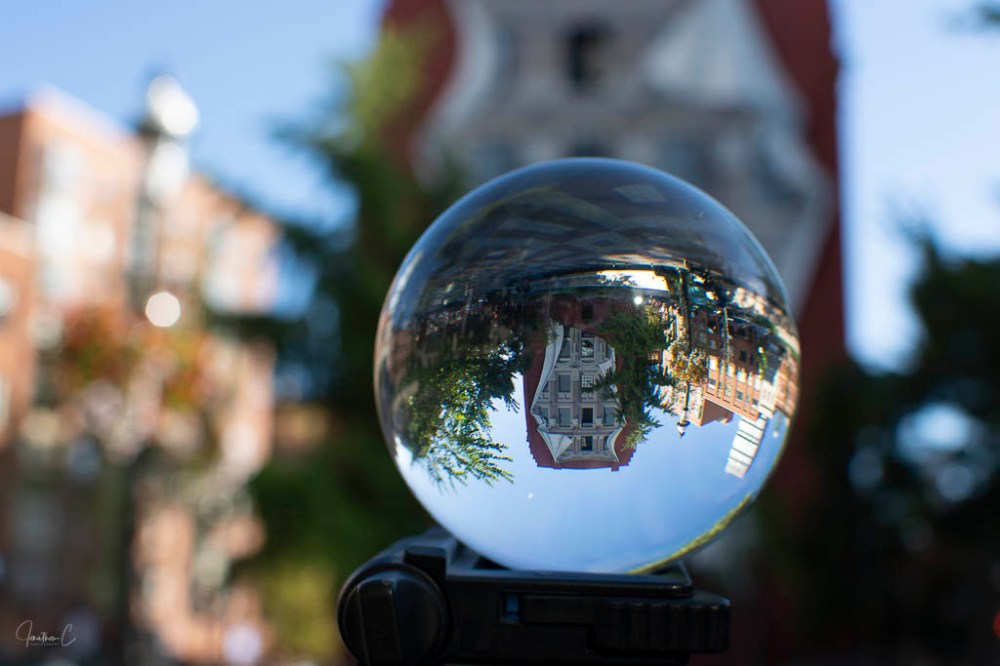
Within the ball, the mural is well-positioned and clear, there is a good amount of the patterned walkway in the foreground and the sky is clear of clouds yet doesn’t dominate the shot.
While I do like the image, there are things that I feel detract from it – most notably the 2 flares, part of the mural not being visible, and the outline of trees “in the sky”. Fortunately I do have a plan to rectify these shortcomings, which I will illustrate in my next blog!
Until then, I’d love to hear from you! Did you find this interesting? Useful? Please share your thoughts and what you liked about it!
COMING SOON: The first in a new “Where To” series showcasing the area where the Flatiron Mural is located.
Don’t forget to click like and recommend Jonathon C Photography to your friends or anyone you know who may find it interesting.
Finally, please follow jonathoncphotography.com so you can always be first to hear about all the new content that I post!

[…] addition to it’s shape, the building is also famous for the mural on the back wall. The Flatiron Mural uses a trompe l’oeil effect to fool the eye into believing the building has more windows […]
LikeLike
[…] to the second “How To” post on the Flatiron Mural. Previously, I shared my initial steps in capturing the image. This post will outline the next step: creating a mirror […]
LikeLike
[…] to create a beautiful urban landscape image from a unique point of view. As with previous posts, my hope is to inspire and create discussion and I look forward to hearing about your approach […]
LikeLike
[…] to create a stunning interior image focusing on depth, shape and symmetry. As with previous posts my hope is to inspire and create discussion. I look forward to hearing about your approach using […]
LikeLike