Welcome to this bonus “How To” post! In my previous series, I outlined my creative process for my Skywalk shot. However, when capturing shots for that, another shot captured my eye, and I decided to work with that as well.
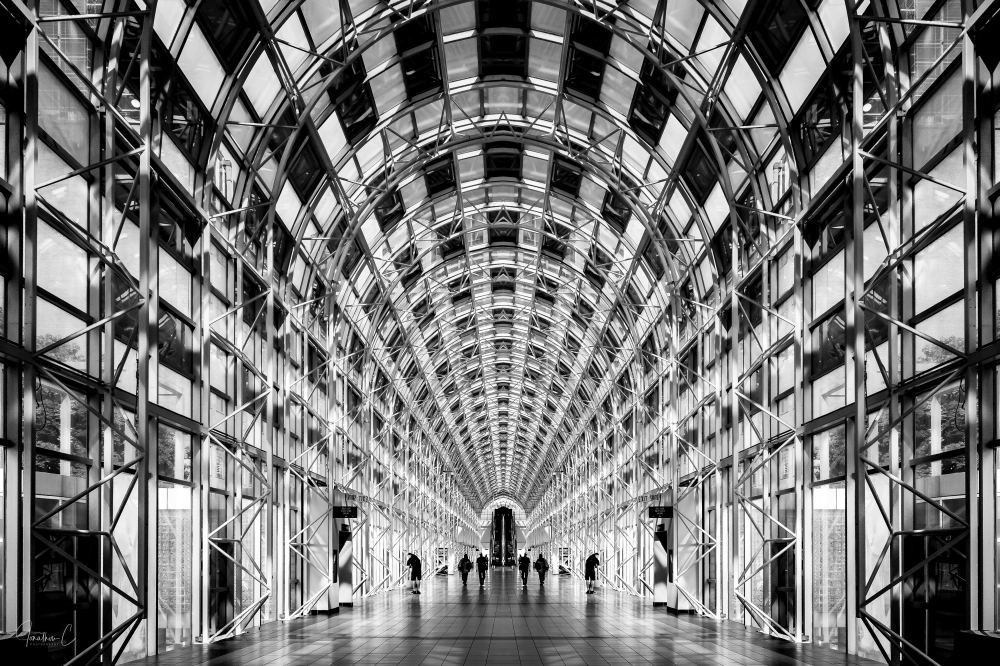
This is that image:
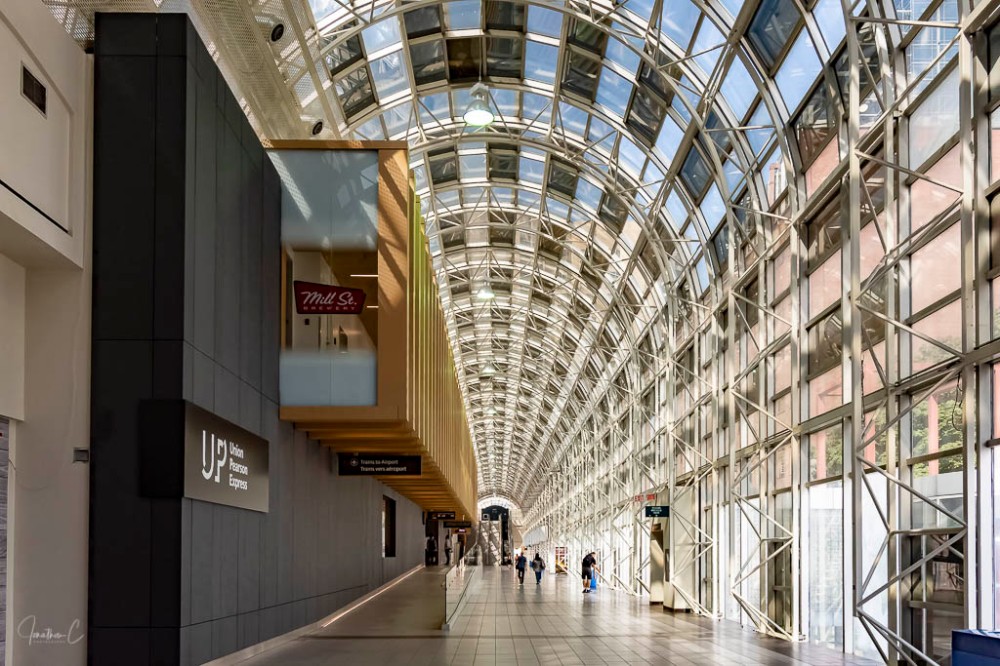
Originally, I did not choose this to work with it because I felt it lacked the shadows on the floor I wanted in my shot. Having looked at it again however, I saw an image that, because of perspective at which it had been captured, illustrated the depth and grandeur of the structure, and so I decided to create another piece with it.
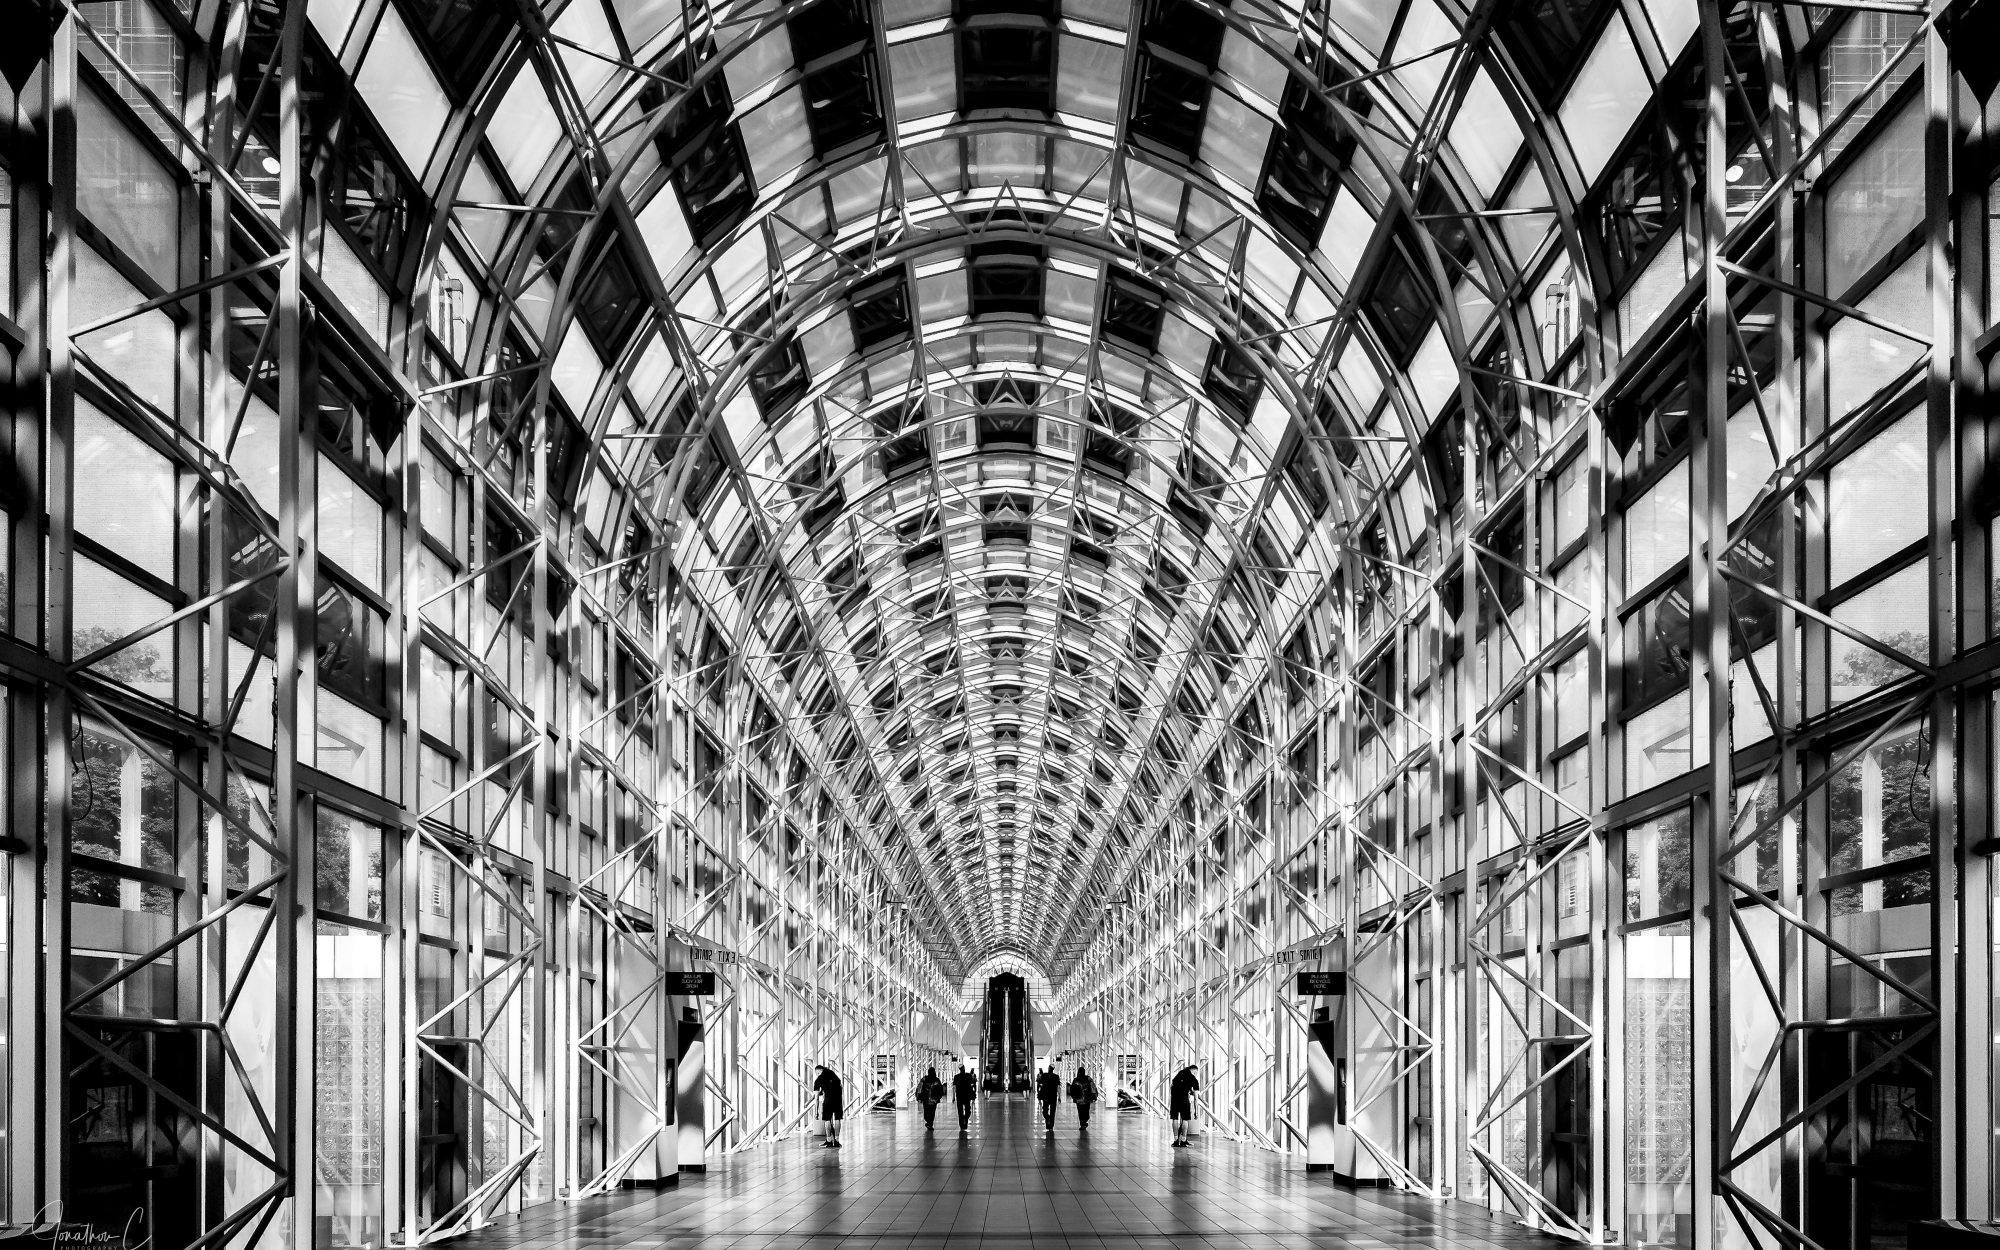
Here is that image:
To create this, the same steps outlined in my previous posts were followed, but with a few tweaks particular to this shot. This post will review (in abridged form) how I created the mirror image.
Step 1: Auto Align in Lightroom
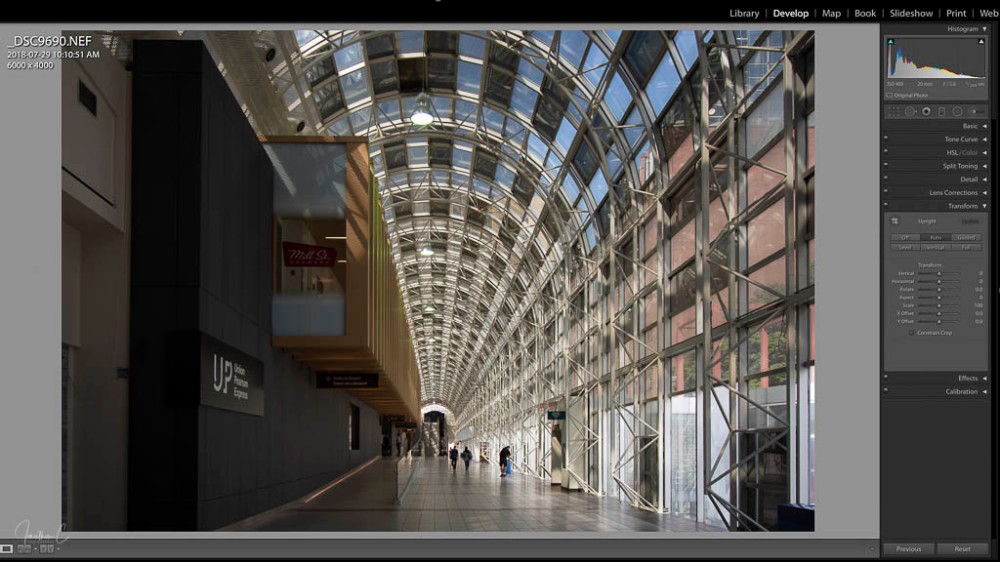
- Open the TRANSFORM panel
- Choose AUTO
Step 2: Open & Create Layer in Photoshop:
- Hit COMMAND E to open the image in Photoshop
- Hit COMMAND J to create the layer
Step 3: Create a Guiding Line:
- Select VIEW from the top menu
- Select NEW GUIDE
When the new window opens:
- Select VERTICAL
- Set POSITION to 50%
NB: Normally at this point, I would reposition, but here I was happy with the position of the guide line within the shot, so I did not adjust the position of the shot.
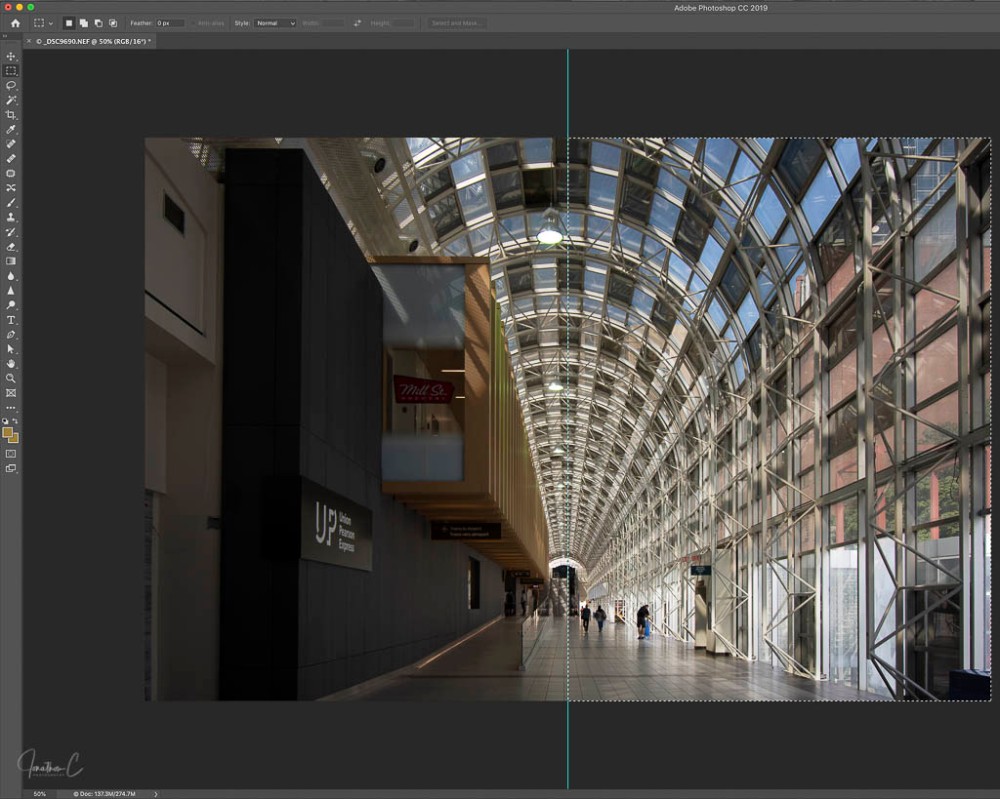
Step 4: Select Half of Image to Mirror:
- Select RECTANGULAR MARQUEE TOOL (“M” on keyboard)
- POSITION CURSOR at top of the Guiding Line
- CLICK, HOLD & DRAG the cursor until half the image is surrounded by dotted line
Step 5: Copy & Paste the selection in a new layer:
- Hit COMMAND C to copy
- Hit COMMAND V to paste
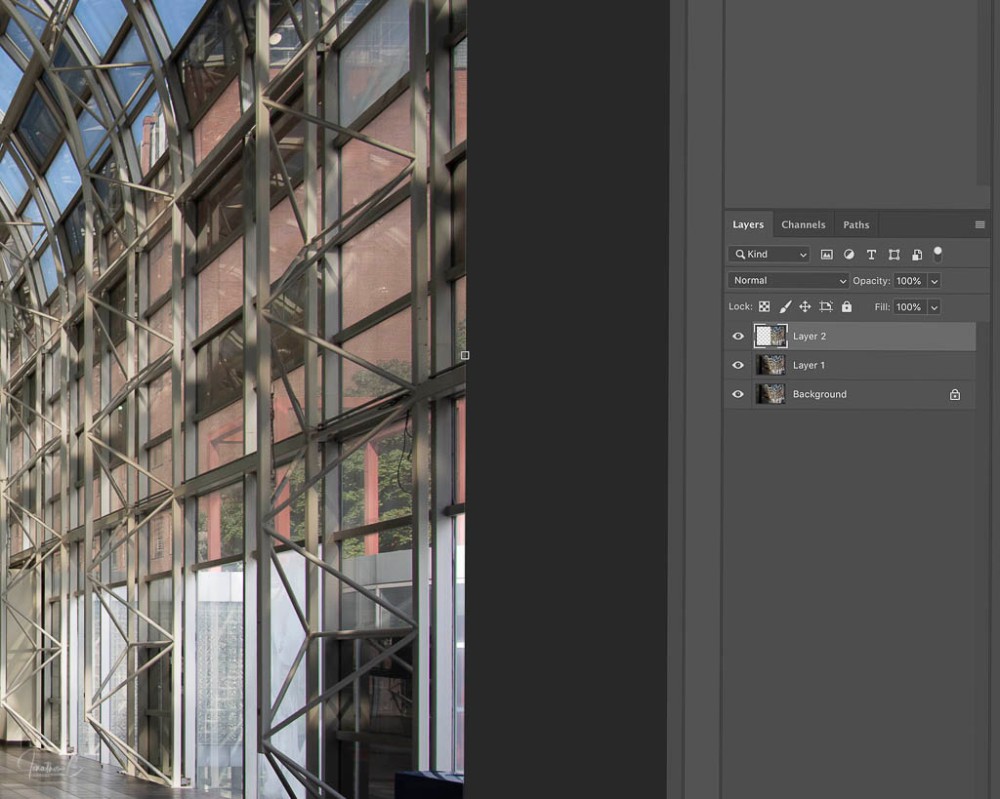
Step 6: Create Mirror Image:
- Select MOVE TOOL
- CLICK on the box and DRAG the layer across to the opposite side of the image
NOTE: ensure that “show transfer controls” at the top of the workflow is enabled to see the boxes around the image
- Click the CHECKMARK at the top of the workflow (once you are happy with the image)
Step 7: Remove the Vertical Guide and Export back to Lightroom:
- Select VIEW
- Select CLEAR GUIDE
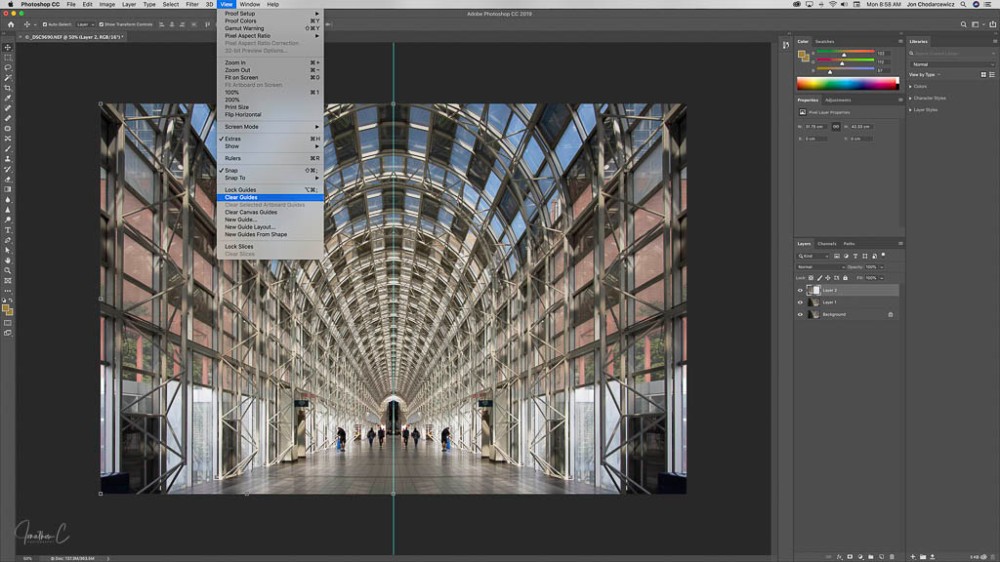
- Select FILE
- Select SAVE
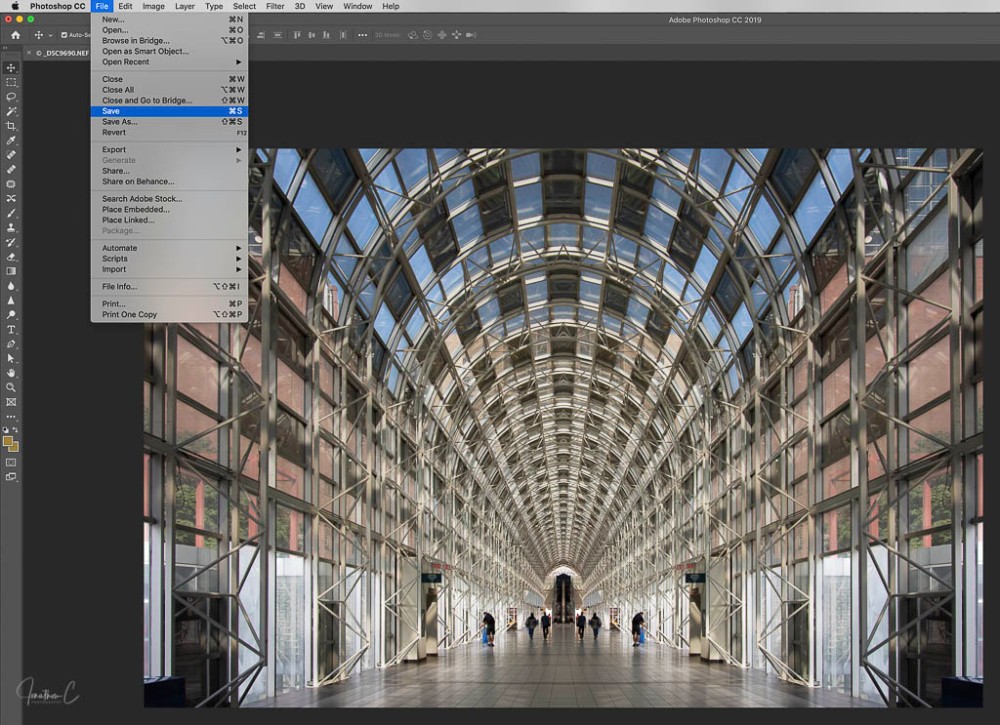
There you have it! In my next post, I will illustrate how I edited this mirror image in Lightroom. Until then, I’d love to hear from you! Did you find this interesting? Useful? Please share your thoughts and what you liked about it!
COMING SOON: The next instalment in my “Where to” series about the area around the Skywalk in Toronto! If you haven’t read the previous instalments please take a look!
Don’t forget to click like and recommend Jonathon C Photography to your friends or anyone you know who may find it interesting.
Finally, please follow jonathoncphotography.com so you can always be first to hear about all the new content that I post!



[…] to create an image when lacking proper equipment to capture an entire scene with one shot. As with previous posts my hope is to inspire and create […]
LikeLike